Week 1
1-1
Part 1: Set up
Make sure you have a blog or someplace to document your work and reflect on your process this semester.
Part 2: Encode
Use the Encode process to reverse engineer these sketches:
- Run
- Speculate
- Investigate
- Annotate
- Modify
-
- Encode 1
- (class example, complete only if you still have questions)
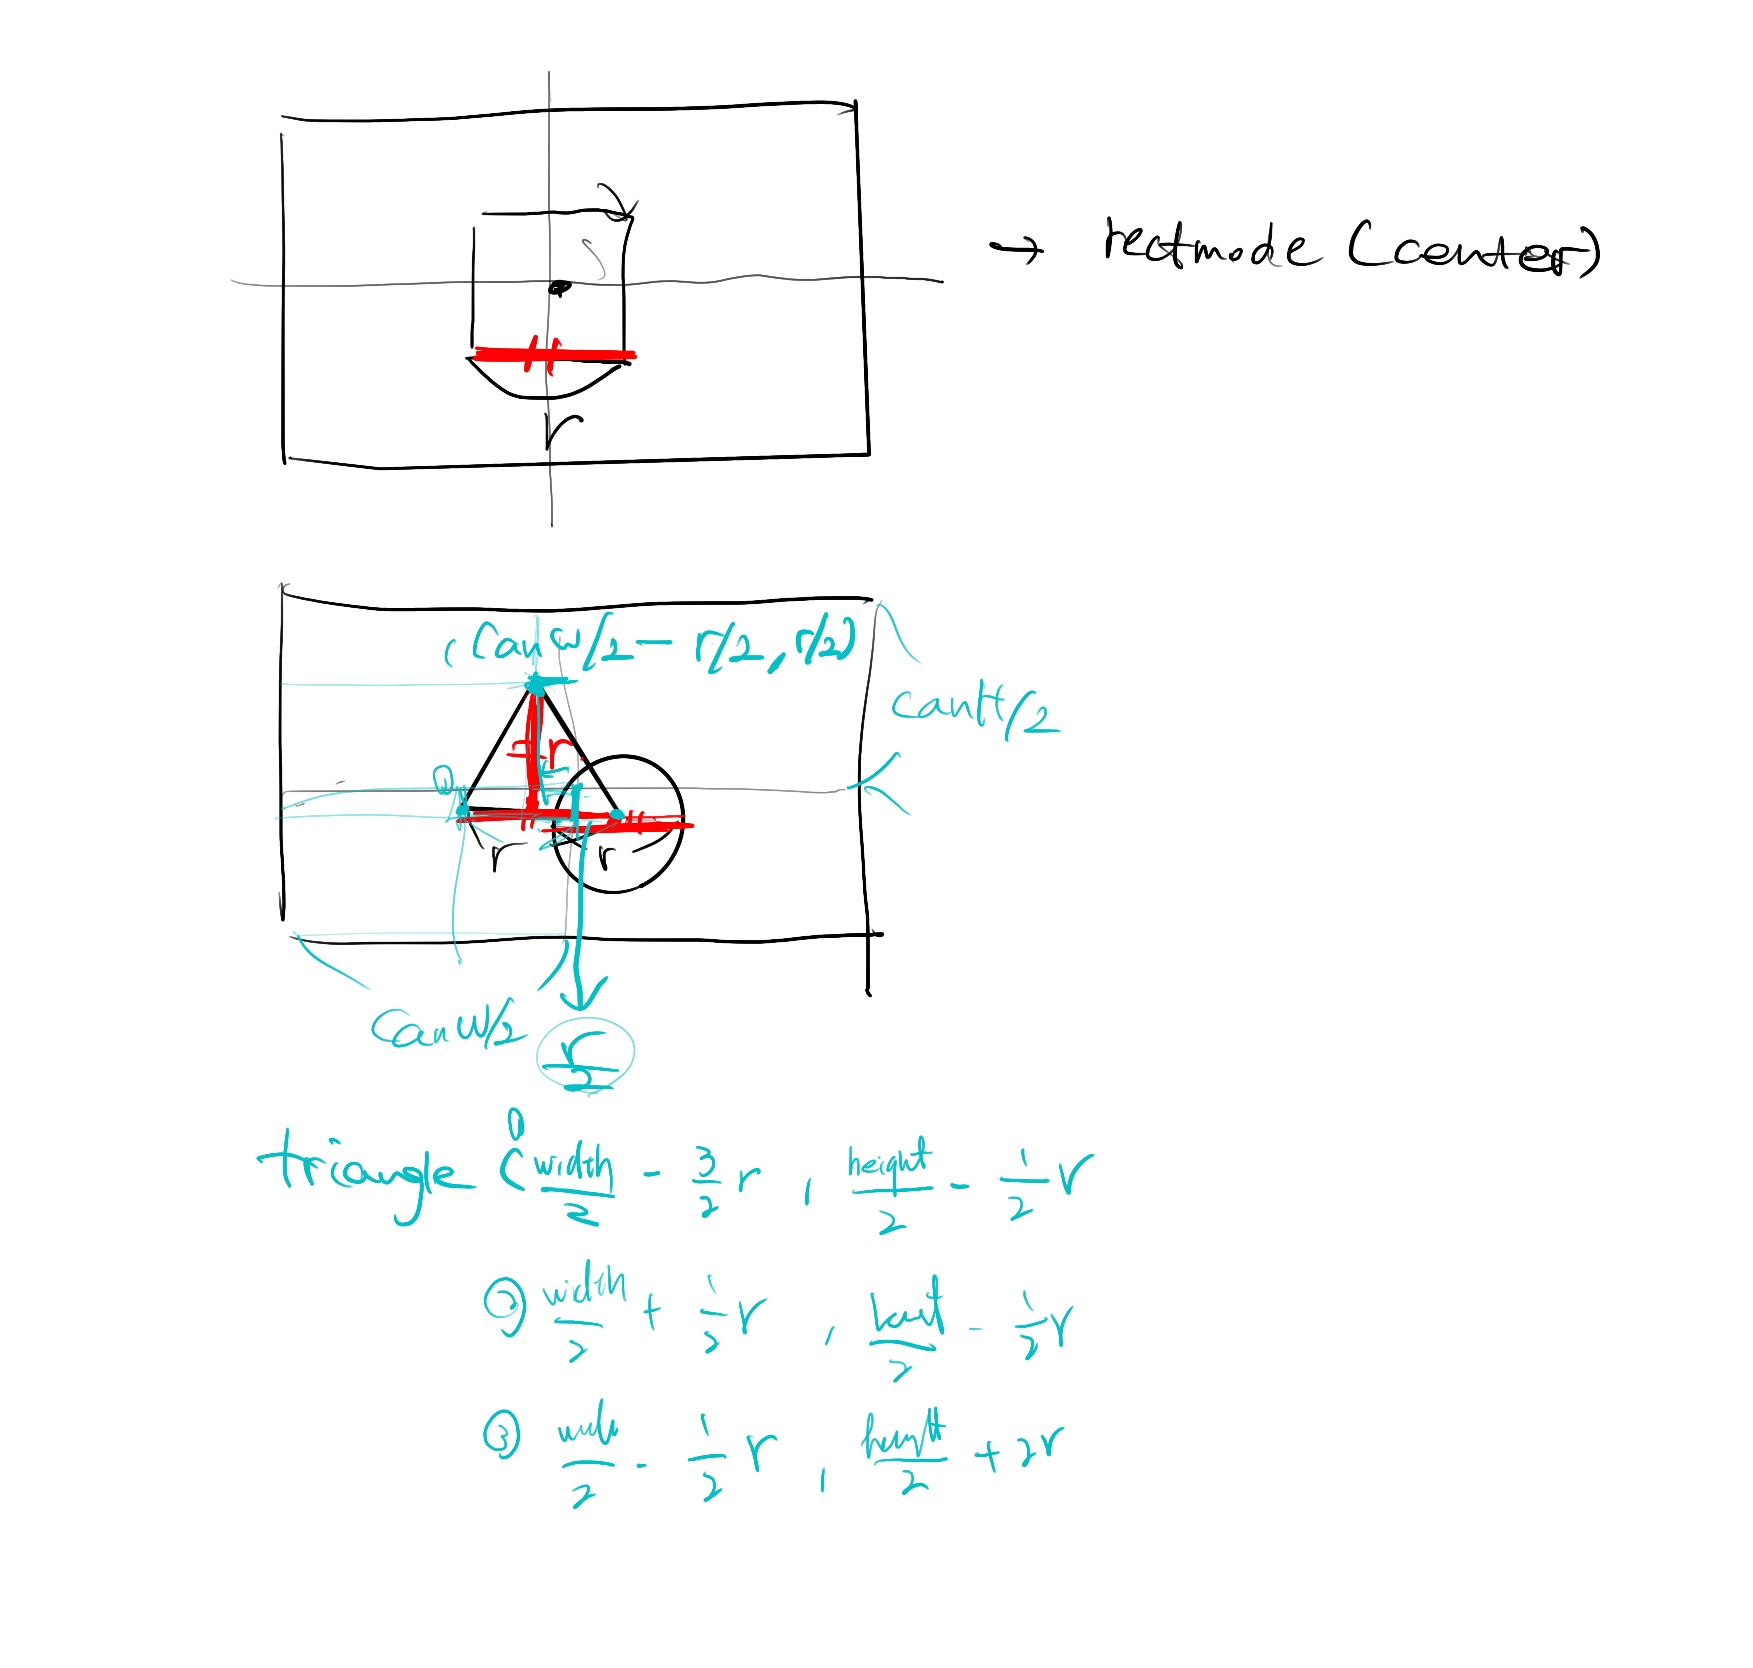
I drew the pattern and found the distance between these elements with Angie. And I did this after class. Finding different blend modes will also affect the background. So add one more blendMode(BLEND), which means the default mode before the loop draws the background again.
- Encode 2
map the range to the location. It will naturally have acceleration when moving.
- Encode 3
- Encode 4
- Encode 5
Part 3: Re/Code
- Create a loading icon (aka preloader or throbber) animation with code. Find and recode an existing one (different from the ones above) or design your own.
Part 4: Document
- Write a blog post. Link to your sketches from Part 2 and Part 3.
- Reflect on the discoveries and challenges you encountered during the exercises. What graphic or animation effects are most pleasing to you? Where did you get stuck, and what steps did you take to troubleshoot? What code-related techniques would you like to explore and practice more?
- Submit here